

Old Style Game Framework How To..
Creating a Game with Old Style Game Framework.
This walk through create a side scroller game, where the player runs across the screen and jumps over obstacles. The walk through uses the Old Style Game Framework (1.0.2), Game Doc (1.2.3) and Game Designer (1.2.2).
Updated versions: Old Style Framework (1.1), Game Doc (1.3) and Game Designer (1.3)
- Go to the "Animations" tab. This tab is divided into two main sections. The completed animations on the left side, and two additional tabs on the right side, and one for Basic animations and one for Complex animations. Complex animations are Animations that have Animation object inside of them, like the RandomAnimation and CompositeAnimation. We will use the Basic tab.
- The Basic tab is split into two sections: the Animation section and Image Workspace section.
- The Image Workspace is for cutting the image into cells. You will
notice a button labeled "New Static", this loads an image
and creates a StaticAnimation from the entire image. We will be using
a multi-cell image. In the Image Workspace, click the "Load Image"
button, and select the "runningLeft.gif" from where you have
saved it.
- The image will be copied over to the the project's images folder.
- The image will be loaded in the large pink field, and ready for processing.
- You can load images that you need for other non-standard objects, and can retrieve them through the GameDocument. (more on this later).
- At the bottom if the image field is a text box with the size of
the image. This one is 300 x 62.
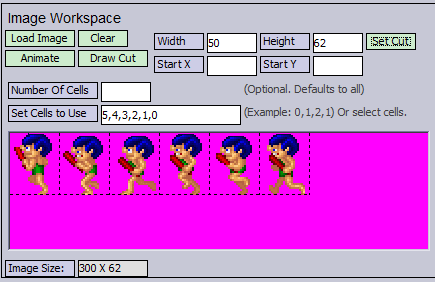
- Now we will cut the cells from the image. You can use the mouse to draw the cut lines, but it's more acurate to set the sizes. I measured each cell to be 50 x 62. Enter in the width of 50 and the height of 62 and click "Set Cut". Dashed lines will appear around each cell.
- Oddly, This animation is setup backwards; the cells go from right
to left. To set the cells in the correct order we simply click them
with the left mouse button. Each cell from right to left. In the
"Set Cells to Use" text box, the cell numbers will appear
as you select them. (You will see cells to use: 5,4,3,2,1,0).
- You can type the cell numbers manually, separating them by a comma. Remember this is a zero base system.
- Click Animate. This will put the cells into an Animation object and send it to the Image Animation section.
- Since this is the character running, we want to loop the animation sequence. Select "LoopedAnimation" from the drop down.
- Click "Run" and the animation will move. The guy will
run at 100 milliseconds per cell. (100 is the default setting).
- You can adjust this by clicking the "Faster" and "Slower" buttons, which change the rate one millesecond at a time.
- You can type a number in the text box and click "Set Rate" to change the rate as well.
- The number label list the current rate, which is how long
the cell will display for in milliseconds.
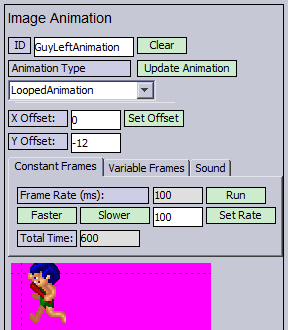
- Enter in an ID. "GuyLeftAnimation".
- Our tile squares are going to 25 by 25. So we are going to set an offset for the sprites height to -12. This will make the sprite 50 pixel tall and 50 pixel wide, with 12 pixel above the origin. This will make are guy stand on the tiles correctly.
- Click "Set Offset" this will move the character up, above the zero base line.
- Select the Sound tab. Then click update Sounds. This will update the drop down list with all the available sounds.
- Select the "Walk" sound in the drop down.
- Click Set Sound. The Frames is for setting when you want the Sound to start in the sequence of the animation. It defaults to zero.
- Now click the Run button again, and you will get sound with you guy running.
- Click Create Animation.
- The Image Animation area will be cleared.
- An icon of the guy will appear in the Animations section.
- You can select an icon from the Animations section. Then Edit, Delete or Copy it.
- Now we'll do the same for "runningRight.gif". (Follow the
steps in step 11, except as noted here.)
- These cells are sequenced from left to right. This is the expected ordering, so the Game Design is setup to order the cut cells. So we don't have to select the cells to use.
- After setting the cut, click "Animate".
- Set this as a LoopedAnimation with the same rate as the previous animation.
- Add the same sound.
- Set the ID to "GuyRightAnimation" and create.
- This icon will also appear in the select list on the left.
- Next we will do the standing animation.
- Load "StandLeft.png", Since this is a single cell iamge, click Animate, adn the whole image will be used.
- Set the Y offset to -12.
- Set the ID to "GuyStandLeft" and create.
- Repeat the steps for the standing right image.
- Loading "StandRight.png", with the Y offset of -12.
- Set the ID to "GuyStandRight".
- Now we will create the jumping motions.
- First load the "jumpLeft.gif". This is a single cell image, click Animate, to use thewhole image.
- Select the "StaticAnimation". There will be no frame rate and no off set.
- Set the ID and Create the Animation.
- Do the same for the "jumpRight.gif."
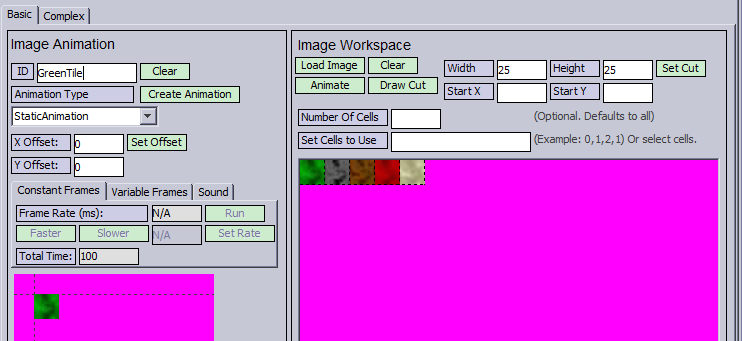
- Now we are going to create the tiles for our game map.
- Load sqTiles.png. These tiles are 25 x 25. Set the cut and animate the first (green) tile.
- The tiles will be StaticAnimations, and since it is the size of our tile size, there will be no off set.
- Create the animation with an ID of "GreenTile"
- Create the animations for the gray, brown, red and white tiles as well.
- Now for the fireball and the explosion.
- Load the FireBall.png
- Set the cut at 25 wide and 52 high.
- Click Animate
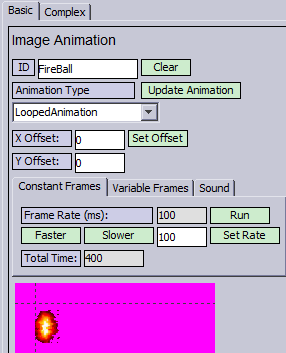
- Set the animation to LoopedAnimation.
- We want the fireball to be centered vertically, so set the Y offset to -13
- Since the Fire sound loops we are going to add this later.
- Load explosion.png.
- Set the cut at 33 wide and 32 high.
- Click Animate and set the animation to the OnceAnimation. This
animation will play once then stop.
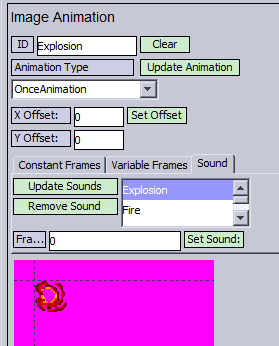
- Since our tiles will be 25x25, we need to offset the explosion so it displays centered. Set X to -4 and Y to -3.
- Add the Explosion sound.
- Save Animation as Explosion.
- Next we are going to add some static Animations for labels.
- First load "Jojo.png". Since this is a static image, just click "New Static". This will create a new StaticAnimation with the name "Jojo". The application removes the suffix from the name.
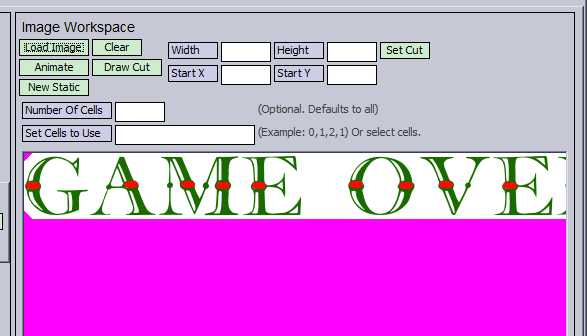
- Load "GameOver.png". This will also be a static image,
just click "New Static". This will create a new StaticAnimation
with the name GameOver.
- This completes all the animations we will use in the game.
Next -> Motions